


Introduction
The first step in any visualization is to get the data you want to work with. Vega is no different. Before you can show anything on the screen, you need to bring in the data—and Vega gives you several flexible ways to do just that. In this post, we’ll explore how to import datasets using the data block.
The ‘data’ Block
In Vega, datasets are defined inside the data block. As mentioned in the previous post, this block takes an array, which means you can define multiple datasets—each one as a JSON object.
To make things easier, Vega provides some helpful properties you can use for each dataset. Let’s take a look at a few of them and how they work:
-
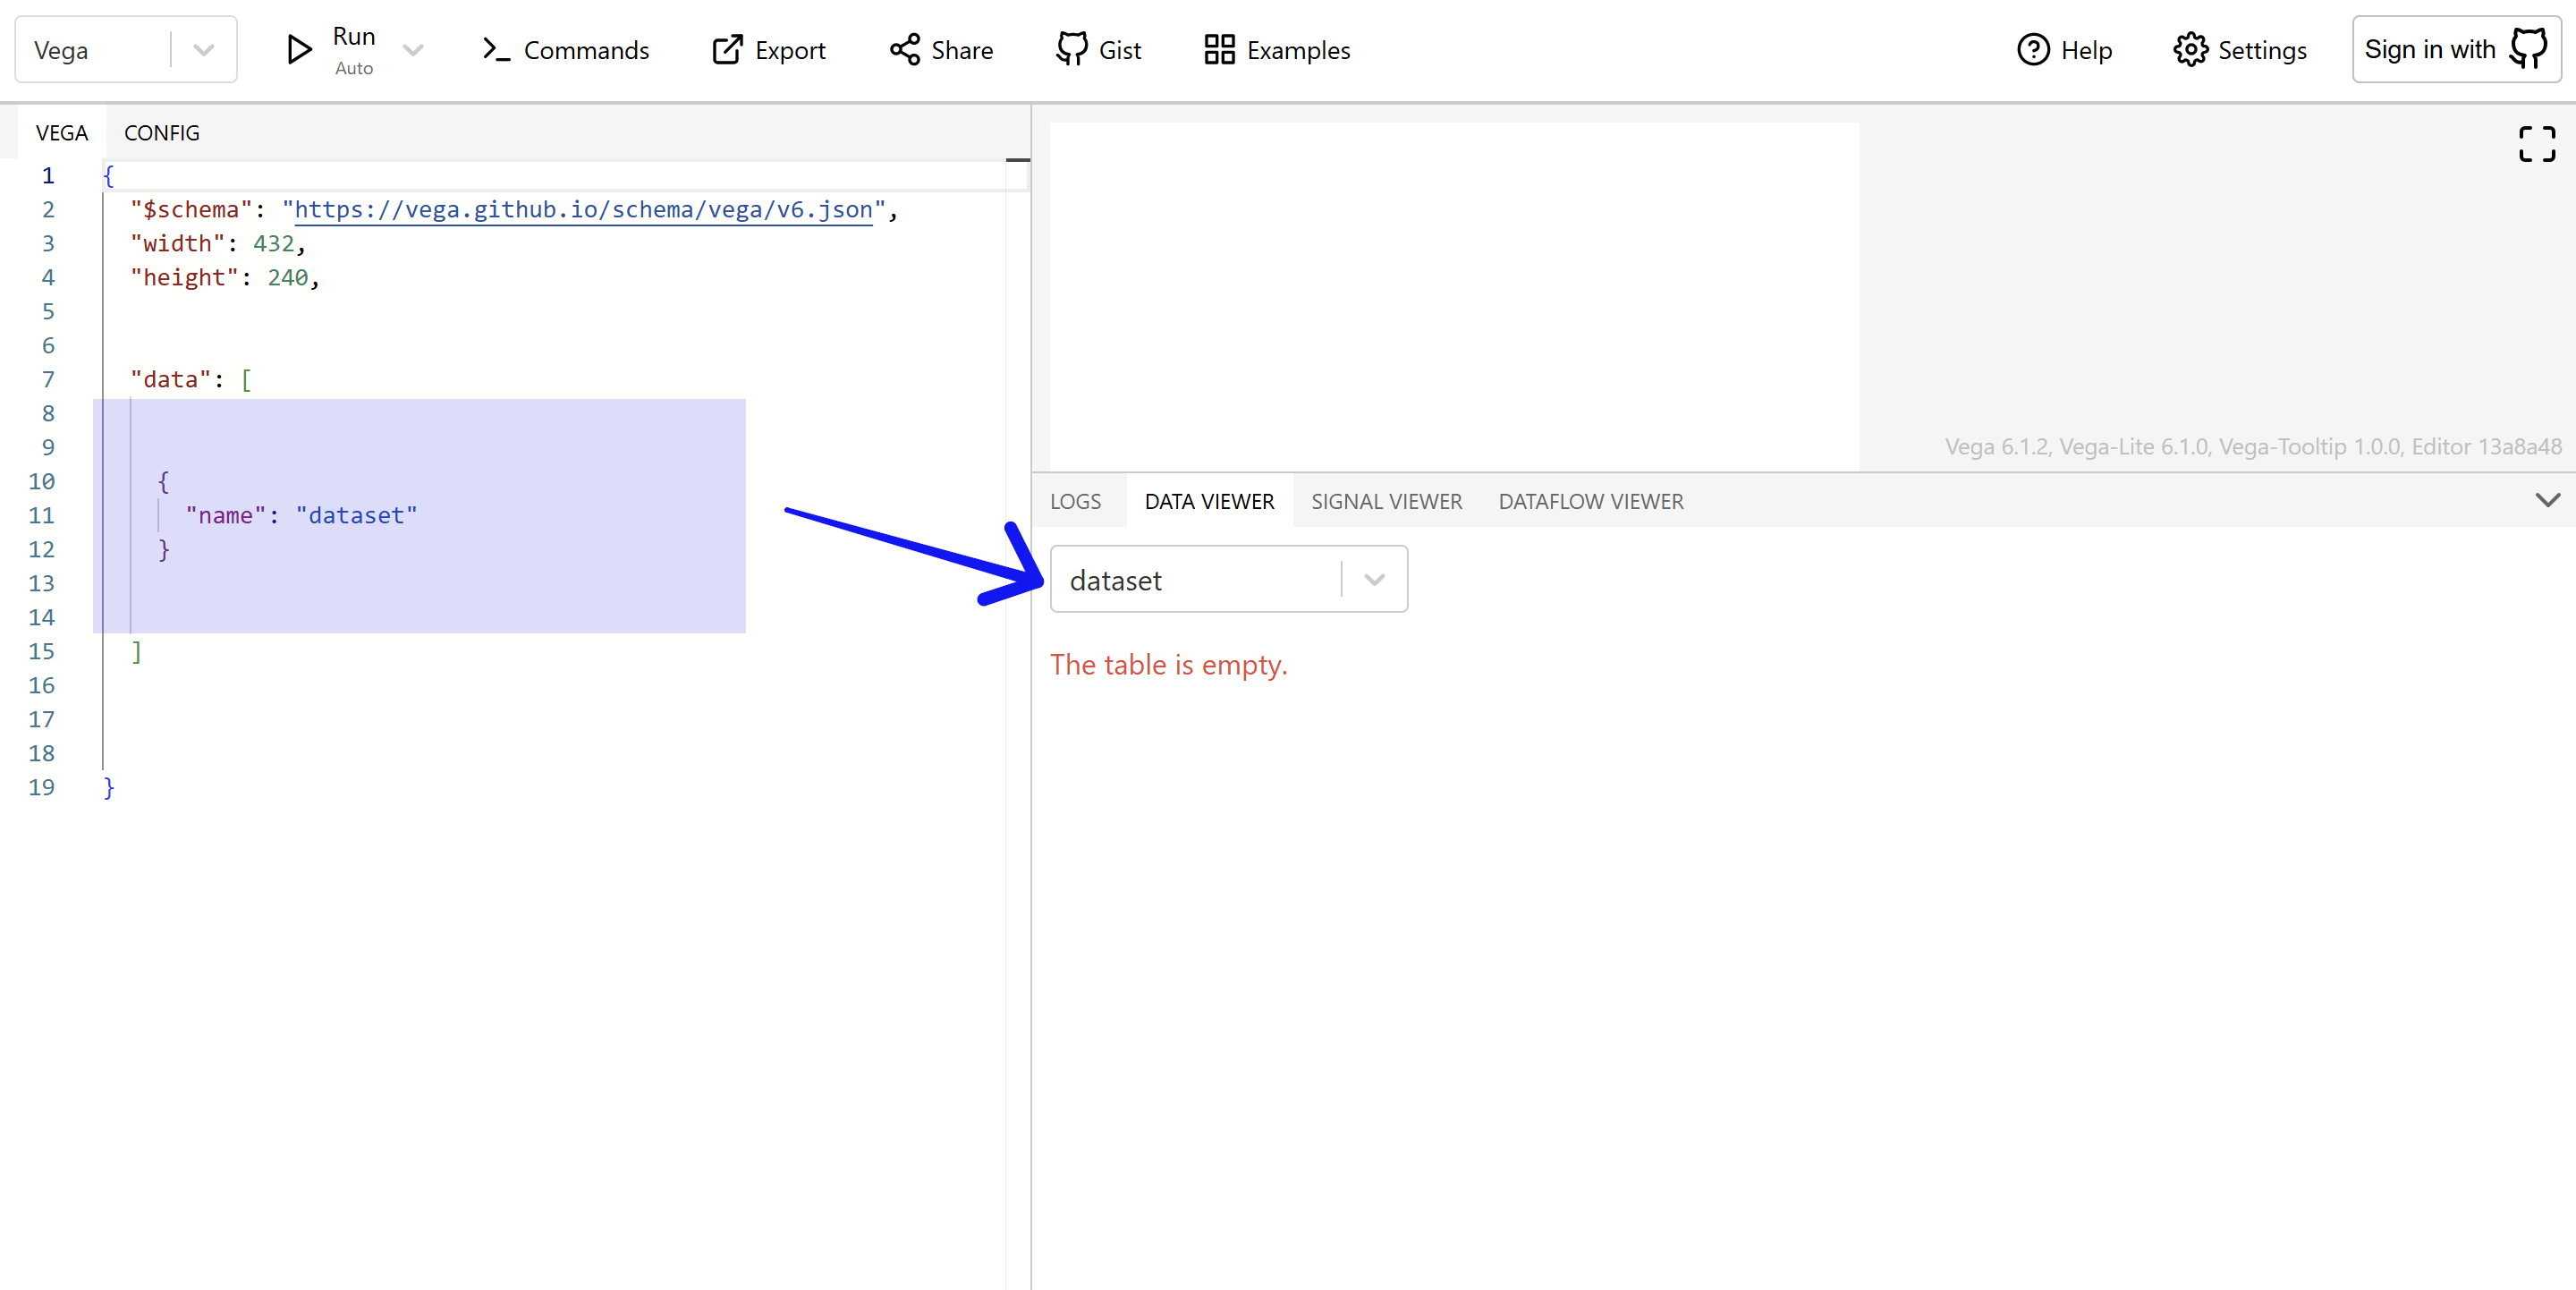
name: This is the only required property. Each dataset must have a unique name. If you use the same name more than once, the last one will overwrite the previous one. If you only provide thenameand nothing else, you’ll end up with an empty dataset.
-
url&source: Useurlto load data from an external source. If you want to create a new dataset from an existing one, use thesourceproperty and reference the original dataset’s name. This is especially useful for filtering or transforming data.
{
  "data": [
    {
      "name": "jobs",
      "url": "https://cdn.jsdelivr.net/npm/vega-datasets@3.1.0/data/jobs.json"
    },
    {
      "name": "jobsCopy",
      "source": "jobs"
    }
  ]
}
In this example, the first dataset (jobs) is loaded from an external link, and then a second one (jobsCopy) is created as a copy.
-
format: This defines how the data should be parsed. By default, Vega assumes external data is in JSON format. But if you’re working with CSV, TSV, or other formats, you can use theformatproperty to specify the correct type.
{
  "data": [
    {
      "name": "jobs",
      "url": "https://cdn.jsdelivr.net/npm/vega-datasets@3.1.0/data/github.csv",
      "format": {"type": "csv"}
    }
  ]
}
-
values: This is used when you want to hardcode data directly in the spec. The most common format is JSON, but you can also use CSV or other formats—as long as you declare it in theformatproperty.
{
  "data": [
    {
      "name": "inlineJSON",
      "values": [
        {"a": 9, "b": 7, "c": 5},
        {"a": 19, "b": 27, "c": 35},
        {"a": 99, "b": 79, "c": 59}
      ]
    },
    {
      "name": "inlineCSV",
      "values": "a,b,c\n9,7,5\n19,27,35\n99,79,59",
      "format": {"type": "csv"}
    }
  ]
}
In the example above, we hardcoded the same dataset in two different formats. Take a look at how they show up in the code editor. Notice anything interesting? 🤔
The ‘data’ Block in Deneb
If you’re using Vega inside Power BI with Deneb, things work a bit differently—but also more conveniently.
When you drag columns and measures into the Deneb visual, it behaves just like the table visual in Power BI. Deneb automatically creates a dataset called dataset with the fields you’ve included. This dataset is exactly what you’d see in a Power BI table visual—with the same columns, measures, and row order.
To use this dataset in your Vega spec, you just need to reference dataset by name.
{
  "data":[
    {
      "name": "dataset"
    }
  ]
}
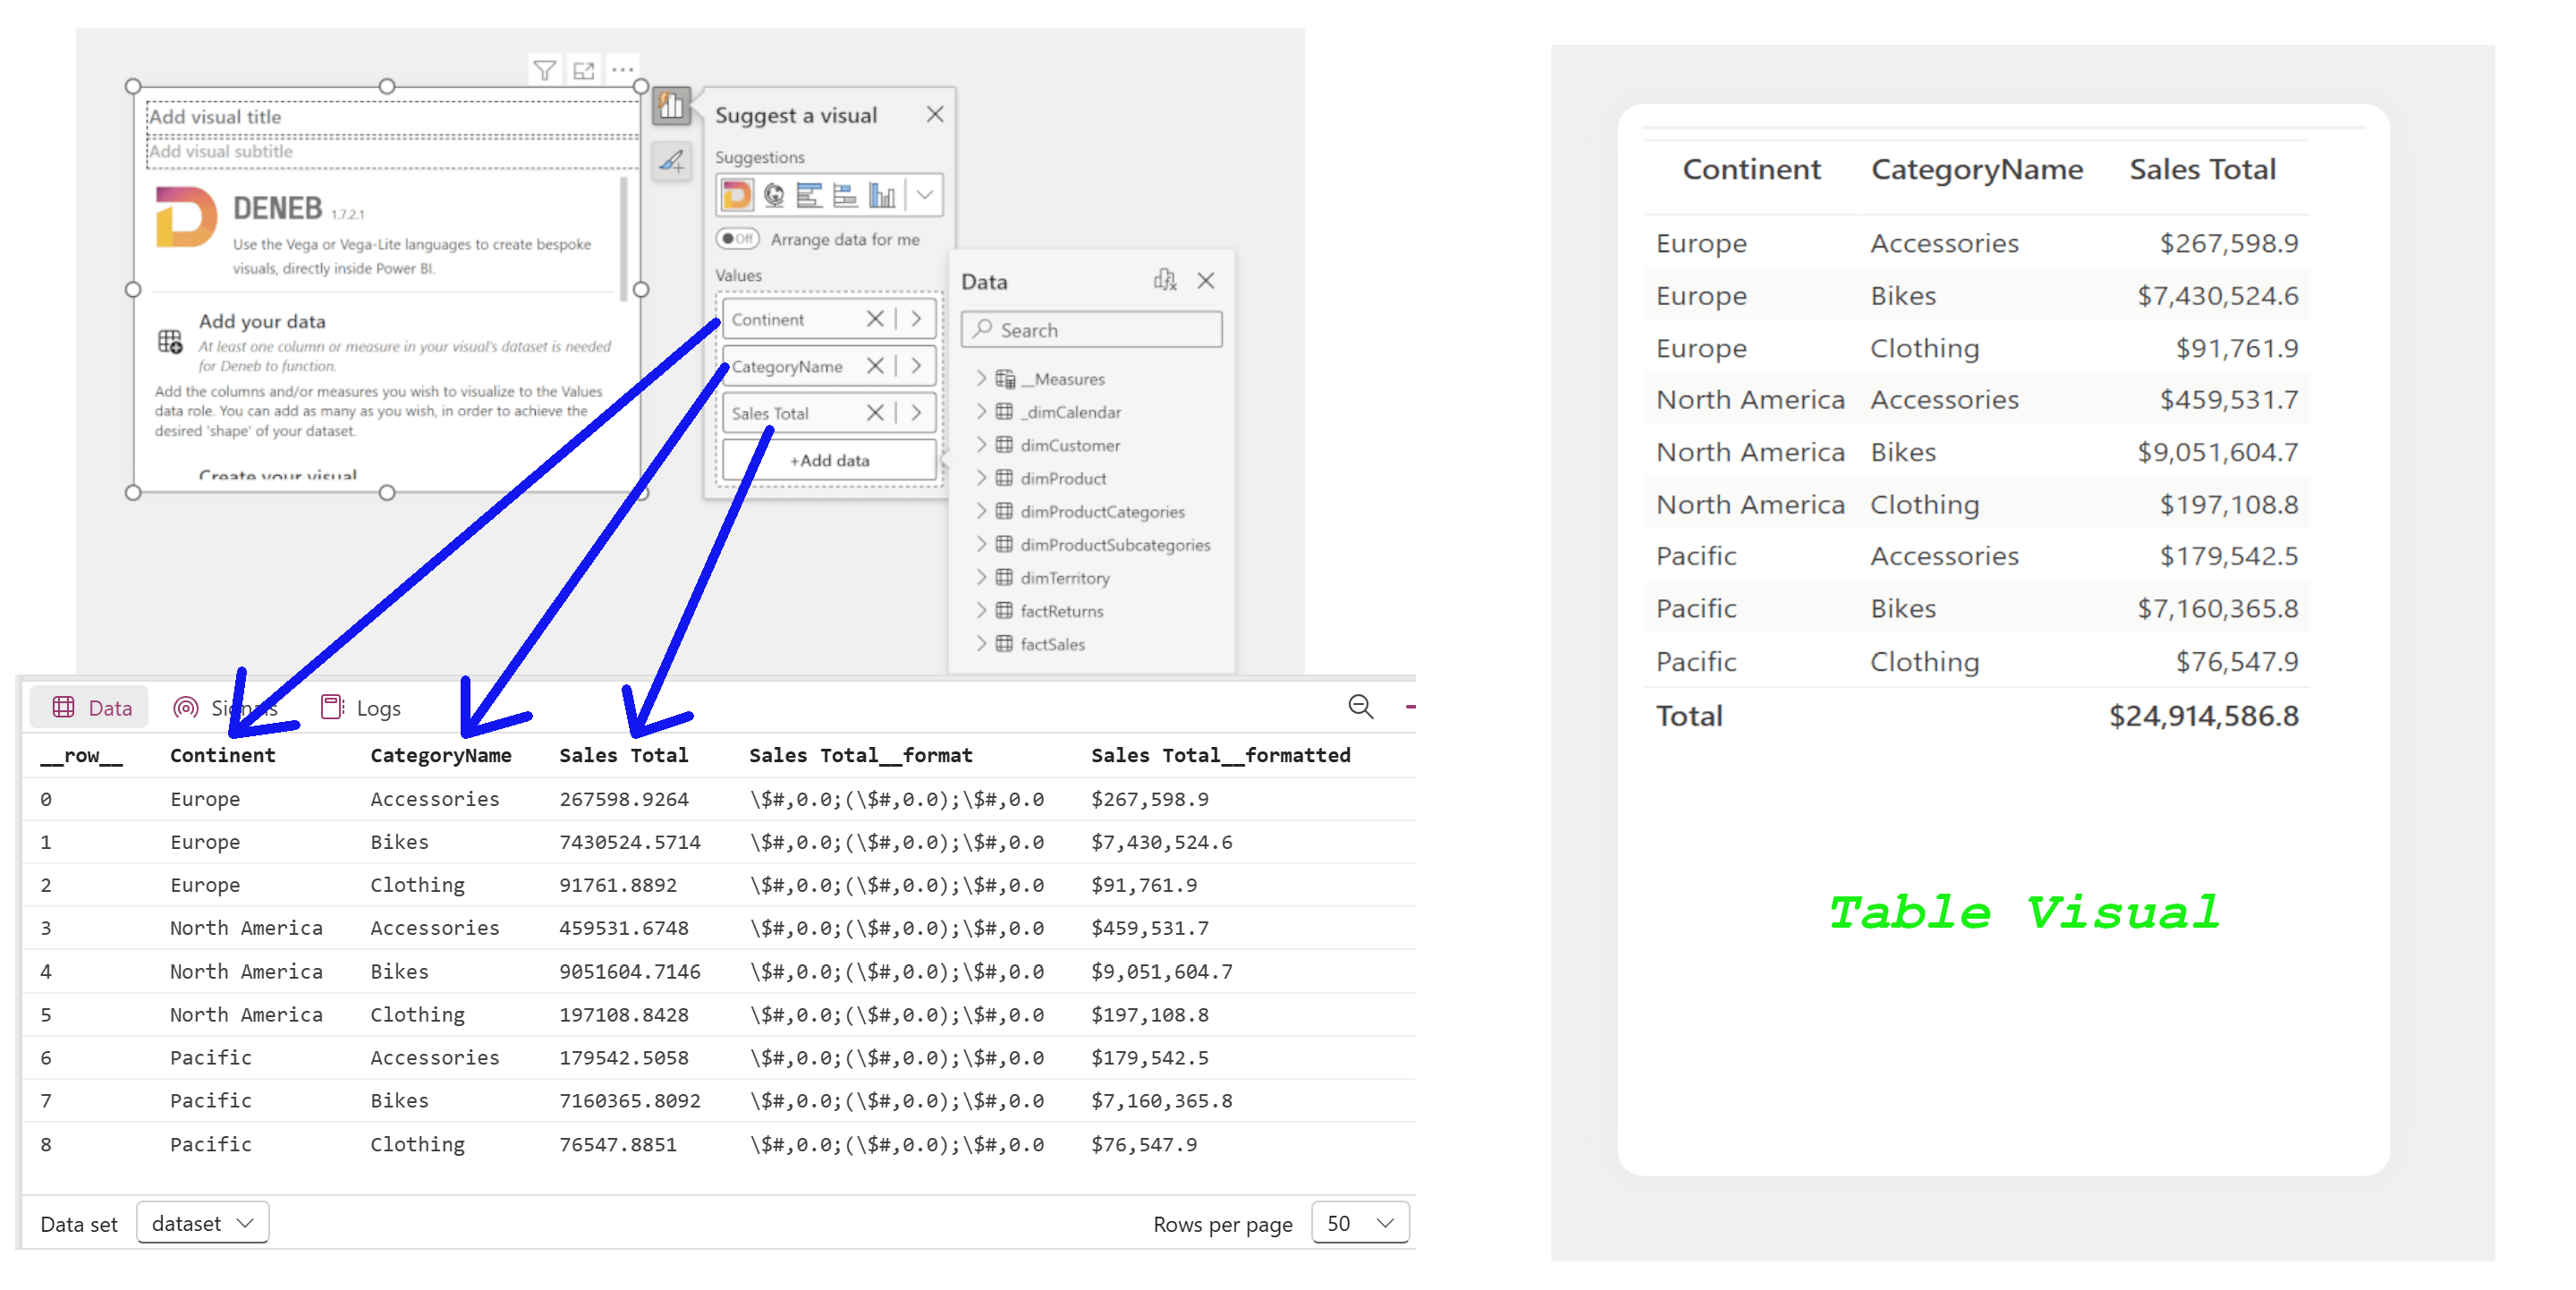
You might notice a few extra columns you didn’t add yourself. These are included by Deneb to support interactivity features like highlighting and filtering. We’ll dig into those later.
Example Datasets
Vega provides a collection of sample datasets in various formats that are perfect for learning and experimenting. You can explore them here. To use any of these datasets, just set the url like this: "https://cdn.jsdelivr.net/npm/vega-datasets@3.1.0/data/<datasetName.format>". Replace <datasetName.format> with the actual name and format of the dataset you want to use.